
PythonからGoogle Spreadsheetにアクセス
別記事でPythonからグーグルドライブへのアクセス方法を紹介しましたが、今回はスプレッドシートへのアクセス方法をまとめてみました
APIの追加
前回記事のOAuth2.0への登録を参考にOAuth2.0での認証のための準備を行います。今回はSpreadsheetへアクセスするため、Drive APIの追加に加えてGoogle Sheet APIも追加します
Google APIのメニューから、ライブラリ -> Google Sheetで検索し、Google Sheet APIを追加します。
Classの準備
認証部分のコードは前回とほぼ同じですが、今回はDriveに加えて、SheetにもアクセスするためClass化して再利用しています。
import io
import os
import pickle
from pprint import pprint
import string
import sys

from google.auth.transport.requests import Request
from google_auth_oauthlib.flow import InstalledAppFlow
from googleapiclient.discovery import build
import google.oauth2.credentials


class GoogleApiBase:
    """Google APIにアクセスするためのベースクラス"""
    CLIENT_SECRETS_FILE = os.path.join(
        os.path.dirname(__file__), 'client_secret.json')
    USER_CREDENTIALS_FILE = os.path.join(
        os.environ['HOME'], '.credentials', os.environ['USERNAME'] + '.credentials')

    def __init__(self):
        self.service = None

    def get_authenticated_service(self, scopes, api_name, api_version):
        credentials = None
        if os.path.exists(self.USER_CREDENTIALS_FILE):
            try:
                with open(self.USER_CREDENTIALS_FILE, 'rb') as fi:
                    credentials = pickle.load(fi)

                if credentials.expired and credentials.refresh_token:
                    credentials.refresh(Request())
            except EOFError as e:
                pass

        if credentials is None or not credentials.valid:
            flow = InstalledAppFlow.from_client_secrets_file(
                self.CLIENT_SECRETS_FILE, scopes)
            credentials = flow.run_console()

        with open(self.USER_CREDENTIALS_FILE, 'wb') as fo:
            pickle.dump(credentials, fo)

        self.service = build(api_name, api_version, credentials=credentials)


class GoogleDrive(GoogleApiBase):
    """Google Driveにアクセスするためのクラス"""
    API_CFG = {'api_name': 'drive',
               'scopes': ['https://www.googleapis.com/auth/drive'],
               'api_version': 'v3'}

    def __init__(self):
        super().__init__()
        self.get_authenticated_service(**self.API_CFG)

    def list_drive_files(self, **kwargs):
        return self.service.files().list(**kwargs).execute()

    def update_drive_files(self, **kwargs):
        return self.service.files().update(**kwargs).execute()

    def get_id_info(self, file_id, **kwargs):
        return self.service.files().get(fileId=file_id, **kwargs).execute()

    def get_path_info(self, path):
        """指定パスのファイル情報を取得"""
        parent_id = 'root'
        info = None
        for depth, name in enumerate(path):
            if depth < (len(path) - 1):
                mimeType = "mimeType = 'application/vnd.google-apps.folder' and "
            else:
                mimeType = ""
            res = self.list_drive_files(q=f"'{parent_id}' in parents and "
                                        f"{mimeType} "
                                        f"name = '{name}'")
            if 'files' not in res or len(res['files']) < 1:
                return None
            info = res['files'][0]
            parent_id = res['files'][0]['id']

        return info

    def get_path_id(self, path):
        """指定パスフォルダのfileIdを取得"""
        info = self.get_path_info(path)
        return info['id']


class GoogleSpreadsheets(GoogleApiBase):
    """Google Sheetにアクセスするためのクラス"""
    API_CFG = {'api_name': 'sheets',
               'scopes': ['https://www.googleapis.com/auth/spreadsheets'],
               'api_version': 'v4'}

    def __init__(self):
        super().__init__()
        self.get_authenticated_service(**self.API_CFG)
        self.drive_service = GoogleDrive()  # Google Driveにアクセスするため

   ... #これから追加していく
Google Sheetの操作
新規シートの作成
My Driveに新規ファイルを作成
spreadsheets().create()で新規のシートを作成します。名前はbody引数の{'properties': {'title': name}}で設定します
class GoogleSpreadsheets(GoogleApiBase):
    ...

    def create_sheets_at_root(self, name):
        res = self.service.spreadsheets().create(body={'properties': {'title': name}},
                                                 fields='spreadsheetId').execute()
        return res

sheet_service = GoogleSpreadsheets()

# 新しいSheetをrootフォルダに作成
sheet_service.create_sheets_at_root('test')
指定のフォルダパスにシートを作成
任意のフォルダに作成する場合は、一旦My Driveに作成し、その後parentsプロパティを変更して移動します。フォルダの変更はDrive APIのfiles().update()のaddParentsに新しいフォルダのfileIdを、removeParentsに現在のフォルダのfileId (My Driveの場合は'root')を指定します
class GoogleSpreadsheets(GoogleApiBase):
    ...

    def create_sheets(self, path):
        if len(path) > 1:
            # rootフォルダ以外の場合は作成フォルダのIDを取得
            parent_id = self.drive_service.get_path_id(path[0:-1])
        else:
            parent_id = 'root'

        # rootフォルダに一旦作成
        res = self.service.spreadsheets().create(body={'properties': {'title': path[-1]}},
                                                 fields='spreadsheetId').execute()

        sheets_id = res['spreadsheetId']

        # 作成したファイルを移動
        res = self.drive_service.update_drive_files(
            fileId=sheets_id,
            addParents=parent_id,
            removeParents='root',
        )
        return sheets_id

# 新しいSheetを任意のフォルダに作成
sheet_service.create_sheets(['tmp', 'test'])  # tmp/testを作成
シートの値の読み出し
指定範囲の値を読み出し
読み出しはspreadsheets().values().get()で行います。rangeパラメータに読み出す範囲をA1形式で指定する必要があります
class GoogleSpreadsheets(GoogleApiBase):
    ...

    def get_values(self, sheets_id, value_range):
        """指定された範囲の値を取得"""
        res = self.service.spreadsheets().values().get(
            spreadsheetId=sheets_id,
            range=value_range
        ).execute()

        return res

# Sheetの値を取得
value_range = sheet_service.get_values(sheets_id, value_range='A1:E6')
pprint(value_range)
例えば以下のようなシートの場合、
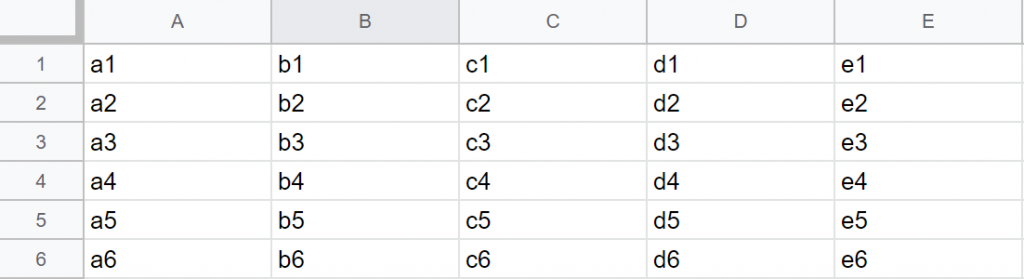
以下のようなデータが返されます
{'majorDimension': 'ROWS',
 'range': "'シート1'!A1:E6",
 'values': [['a1', 'b1', 'c1', 'd1', 'e1'],
            ['a2', 'b2', 'c2', 'd2', 'e2'],
            ['a3', 'b3', 'c3', 'd3', 'e3'],
            ['a4', 'b4', 'c4', 'd4', 'e4'],
            ['a5', 'b5', 'c5', 'd5', 'e5'],
            ['a6', 'b6', 'c6', 'd6', 'e6']]}
全シート値の読み出し
シートの値の範囲が既知の場合は上記方法で問題ないですが、全値を読み出す場合は、最初にシートのサイズを取得し、それをもとに範囲を動的に設定します。シートのサイズはspreadsheets().get()で取得できる情報の['properties']['gridProperties]['rowCount'/'columnCount']で取得できます
class GoogleSpreadsheets(GoogleApiBase):
    ...

    def c1_to_a(self, c):
        base_num = len(string.ascii_uppercase)
        mod = c % base_num
        if c <= base_num:
            return string.ascii_uppercase[c - 1]
        else:
            return f'{self.c1_to_a(int((c-1)/base_num))}{string.ascii_uppercase[mod - 1]}'

    def r1c1_to_a1(self, r, c):
        return f'{self.c1_to_a(c)}{r}'

    def sheets_info(self, sheets_id):
        return self.service.spreadsheets().get(spreadsheetId=sheets_id).execute()

    def get_values_all(self, sheets_id):
        # シートのサイズを取得
        sheets_info = self.sheets_info(sheets_id)

        # R1C1からA1スタイルに変換
        value_range_br = self.r1c1_to_a1(sheets_info['sheets'][0]['properties']['gridProperties']['rowCount'],
                                         sheets_info['sheets'][0]['properties']['gridProperties']['columnCount'])

        # 指定範囲の値を取得
        return self.get_values(sheets_id, value_range=f'A1:{value_range_br}')

# Sheetの値を取得
value_range = sheet_service.get_values(sheets_id, value_range='A1:E6')
pprint(value_range)
シートへ値の書き込み
1セルへの書き込み
値の書き込みはspreadsheets().values().update()のbody={'values'}パラメータに値を、rangeに範囲を指定して実行します。値はvalue[列][行]の二次元配列で指定します
class GoogleSpreadsheets(GoogleApiBase):
    ...

    def write_cell(self, sheets_id, vrange, value, value_input_option='USER_ENTERED'):
        res = self.service.spreadsheets().values().update(
            spreadsheetId=sheets_id,
            range=vrange,
            valueInputOption=value_input_option,
            body={'values': [[value]]}).execute()
        return res

# 1つのCellに値を書き込み
sheet_service.write_cell(sheets_id, 'A1', 'TestString')
値の一括書き込み
値を複数指定することで、複数行の値を一つのコマンドで更新することが可能です。ValueにNoneを指定されたセルは更新されずに現在の値が維持されます
class GoogleSpreadsheets(GoogleApiBase):
    ...

    def write_range(self, sheets_id, vrange, values, value_input_option='USER_ENTERED'):
        res = self.service.spreadsheets().values().update(
            spreadsheetId=sheets_id,
            range=vrange,
            valueInputOption=value_input_option,
            body={'values': values}).execute()
        return res

# 一範囲の複数Cellに一括書き込み
sheet_service.write_range(sheets_id, 'A1:E2',
                          values = [
                              [f'Day{d}' if d % 2 else None for d in range(5)],
                              [f'Time{t}' if t % 2 else None for t in range(5)],
                          ])
シートフォーマットの設定
列の幅を設定
列の幅はspreadsheets().batchUpdate()を用いて設定します。batchUpdate()は複数のrequestを一つのコマンドで受け付けて処理することが可能です。そのため以下の例では一つのrequestのみを実行していますが、実際は行の設定や境界線の設定やセルの値の書き込みなどを一括して実行したほうが効率的です
列の幅はupdateDimensionPropertiesの['properties']['pixelSize']で指定します。列の場合は['range']['dimension']に'COLUMNS'を設定します。['range']['sheetId']はsheetId (個別のシートのID)でspreadsheetId (Excelでいうブック)とは異なる点に注意が必要です
class GoogleSpreadsheets(GoogleApiBase):
    ...

    def set_column_width(self, sheets_id, start_col_index, end_col_index, width, sheet_index=0):
        sheets_info = self.sheets_info(sheets_id)
        sheet_id = sheets_info['sheets'][sheet_index]['properties']['sheetId']
        req_body = {
            'requests': [
                {'updateDimensionProperties': {
                    'range': {
                        'sheetId': sheet_id,
                        'dimension': 'COLUMNS',
                        'startIndex': start_col_index,
                        'endIndex': end_col_index,
                    },
                    'properties': {
                        'pixelSize': width,
                    },
                    'fields': 'pixelSize',
                }
                }
            ],
        }
        res = self.service.spreadsheets().batchUpdate(spreadsheetId=sheets_id,
                                                      body=req_body).execute()
        return res

# 列の幅を設定
sheet_service.set_column_width(sheets_id,
                               start_col_index=0,  # 開始列のIndex
                               end_col_index=3,    # 終了列のIndex
                               width=50)
行の幅を設定
行の幅の設定も列の幅の設定と同様です。違いは['range']['dimension']にROWSを設定することだけです
class GoogleSpreadsheets(GoogleApiBase):
    ...

    def set_row_height(self, sheets_id, start_row_index, end_row_index, height, sheet_index=0):
        sheets_info = self.sheets_info(sheets_id)
        sheet_id = sheets_info['sheets'][sheet_index]['properties']['sheetId']
        req_body = {
            'requests': [
                {'updateDimensionProperties': {
                    'range': {
                        'sheetId': sheet_id,
                        'dimension': 'ROWS',
                        'startIndex': start_row_index,
                        'endIndex': end_row_index,
                    },
                    'properties': {
                        'pixelSize': height,
                    },
                    'fields': 'pixelSize',
                }
                }
            ],
        }
        res = self.service.spreadsheets().batchUpdate(spreadsheetId=sheets_id,
                                                      body=req_body).execute()
        return res


# 行の高さを設定
sheet_service.set_row_height(sheets_id,
                             start_row_index=0,
                             end_row_index=3,
                             height=100)
境界線の設定
境界線はupdateBordersコマンド設定します。上罫線(top)、下罫線(bottom)、左罫線(left)、右罫線(right)、内横罫線(innerHorizontal)、内縦罫線(innerVertical)パラメータでそれぞれの罫線のスタイル、色を設定可能です。'NONE'を設定することで消すことができます
class GoogleSpreadsheets(GoogleApiBase):
    ...

    def set_border(self, sheets_id,
                   start_row_index, end_row_index, start_col_index, end_col_index,
                   top=None, bottom=None, left=None, right=None, innerHorizontal=None, innerVertical=None,
                   style='SOLID',  # SOLID/DOTTED/DASHED/SOLID_THICK/SOLIT_MEDIUM/DOUBLE
                   color=None,
                   sheet_index=0):
        sheets_info = self.sheets_info(sheets_id)
        sheet_id = sheets_info['sheets'][sheet_index]['properties']['sheetId']
        border_cfg = {'top': top, 'bottom': bottom, 'left': left, 'right': right,
                      'innerHorizontal': innerHorizontal, 'innerVertical': innerVertical}
        border = {}
        for key, val in border_cfg.items():
            if val is None:
                continue
            if not val:  # 境界線を消す
                border[key] = {'style': 'NONE'}
            else:
                border[key] = {'style': style, 'color': color}

        req_body = {
            'requests': [
                {'updateBorders': {
                    'range': {
                        'sheetId': sheet_id,
                        'startRowIndex': start_row_index,
                        'endRowIndex': end_row_index,
                        'startColumnIndex': start_col_index,
                        'endColumnIndex': end_col_index,
                    },
                    **border,
                }
                }
            ],
        }
        res = self.service.spreadsheets().batchUpdate(spreadsheetId=sheets_id,
                                                      body=req_body).execute()
        return res


# 境界線を設定する
sheet_service.set_border(sheets_id,
                         start_row_index=1, end_row_index=3,  # 開始行・終了行
                         start_col_index=1, end_col_index=5,  # 開始列・終了列
                         top=True, bottom=True,
                         color={'red': 1, 'green': 0, 'blue': 0},
                         style='DOUBLE')
背景、文字色の設定
updateCellsリクエストでセルのフォーマットを設定します。背景色はuserEnteredFormatのbackgroundColorプロパティで、文字色は['textFormat']['foregroundColor']で設定します。数値の表示形式や表示位置なども同様に設定可能です (参照)
class GoogleSpreadsheets(GoogleApiBase):
    ...

    def set_format(self, sheets_id,
                   start_row_index, end_row_index, start_col_index, end_col_index,
                   bgcolor=None, fgcolor=None,
                   sheet_index=0):
        sheets_info = self.sheets_info(sheets_id)
        sheet_id = sheets_info['sheets'][sheet_index]['properties']['sheetId']
        rows = []
        for row in range(start_row_index, end_row_index):
            cols = []
            for col in range(start_col_index, end_col_index):
                update_item = {}
                if bgcolor is not None:
                    update_item['backgroundColor'] = bgcolor
                if fgcolor is not None:
                    update_item['textFormat'] = {'foregroundColor': fgcolor}

                cols.append({'userEnteredFormat': update_item})
            rows.append({'values': cols})

        fields = []  # 更新する項目を'fields'に設定
        if bgcolor or fgcolor:
            fields.append('userEnteredFormat')

        req_body = {
            'requests': [
                {'updateCells': {
                    'rows': rows,
                    'fields': ','.join(fields),
                    'range': {
                        'sheetId': sheet_id,
                        'startRowIndex': start_row_index,
                        'endRowIndex': end_row_index,
                        'startColumnIndex': start_col_index,
                        'endColumnIndex': end_col_index,
                    },
                }}
            ],
        }
        res = self.service.spreadsheets().batchUpdate(spreadsheetId=sheets_id,
                                                      body=req_body).execute()
        return res


# セルのフォーマットを設定する
sheet_service.set_format(sheets_id,
                         start_row_index=1, end_row_index=3,
                         start_col_index=1, end_col_index=5,
                         bgcolor={'red':0.3, 'green': 0.3, 'blue': 0.3},  #背景: 灰色
                         fgcolor={'red':0, 'green': 1, 'blue': 0},        #文字色: 緑
                         )
最近のコメント